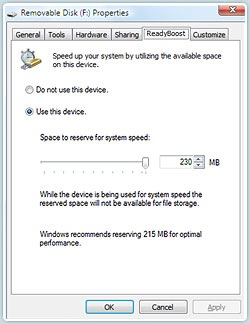
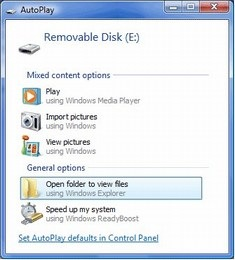
Adding system memory ( RAM) is often the best way to improve a PC's performance, since more memory means more applications are ready to run without accessing the hard drive. However, upgrading memory can be difficult and costly, and some machines have limited memory expansion capabilities, making it impossible to add RAM.
 ReadyBoost is a disk caching technology first included with Microsoft's Windows Vista operating system. It aims to make computers running Windows Vista more responsive by using flash memory on a USB 2.0 drive, SD card, CompactFlash, or other form of flash memory, in order to boost system performance.
ReadyBoost uses the flash drive to store information that is being used by the memory manager. If you are running a lot of applications on a system that has limited memory, Windows ReadyBoost will use the flash drive to create a copy of virtual memory that is not quite as fast as RAM, but a whole lot faster than going to the hard disk. What is very cool here is that there is nothing stored on this flash disk that isn’t also on the hard disk, so if you remove the flash drive, the memory manager sees the change and automatically goes to the hard disk. While the performance gain from ReadyBoost is gone, you don’t lose any data and there is no interruption.

Here are the requirements for a ReadyBoost-compatible USB Device:
- The USB Key must be at least USB 2.0
- The device must be able to do 3.5 MB/s for 4 KB random reads uniformly across the entire device and 2.5 MB/s for 512 KB random writes uniformly across the device.
- The USB Key has to have at least 64mb of free space
Windows ReadyBoost relies on the intelligent memory management of Windows SuperFetch and can significantly improve system responsiveness.Windows SuperFetch enables programs and files to load much faster than they would on Windows XP–based PCs.
SuperFetch monitors which applications you use the most and preloads these into your system memory so they'll be ready when you need them. Windows Vista also runs background programs, like disk defragmenting and Windows Defender, at low priority so that they can do their job but your work always comes first.
NOTE: Superfetch is enabled by default.
1. Open the Start Menu.
2. In the white line (Start Search) area, type services and press Enter.
3. Click Continue button for UAC prompt.
4. Scroll down and right click on Superfetch and click Properties.
A. To Disable Superfetch -
1) Click the Stop button and click Disabled under the Startup type: drop down menu.
2) Click OK.
B. To Enable Superfetch -
1) Click Automatic (Under Startup type) and click the Apply button, then click the Start button.
2) Click OK.
3) Close Services window


