Welcome to IToxy.com

Hi, Welcome to IT Oxy. This blog is primarily aim to share our information on Information Technology. I really appreciate if you are willing to give any input to this blog. If you want to share something, email at: admin@IToxy.com If you found any post interesting and useful, then please leave a comment and share with your friends.

Showing posts with label Virus Removal. Show all posts

How to remove it free “System Care Antivirus” Virus

Please follow the below steps to remove this malware.

Re-boot system in to windows safe-mode

  • Restart your PC through “Start” menu by selecting the respective command.
  • Before Windows OS starts booting press “F8” button of your keyboard repeatedly by hitting it and releasing several times simultaneously.
  • The following windows comes up:

  • Using the arrow keys on your keyboard select the “Safe Mode with Networking” option.

Optional way to terminate the process of System Care Antivirus scam:

1. Make sure you can see hidden files on your PC depending on the operating system of your computer.

How to view hidden files in Windows XP:

  • Open “My Computer”, go to “Tools” tab and select “Folder Options”.

  • In the window that appeared select “View” tab and choose the option “Show hidden files and folders”. Click “Apply” and “OK”.


How to view hidden files in Windows Vista/7:

  • Open “My Computer”, go to “Organize” tab and select “Folder and search options”.


    • In the window that appeared select “View” tab and choose the option “Show hidden files, folders, and drives”. Click “Apply” and “OK”.

2. Find the location of System Care Antivirus malware’s executable.

Typical location for Windows XP:

C:/Documents and Settings/All Users/Application Data/[Random.exe]

Typical location for Windows Vista/Windows 7:

C:/Program Data/[Random.exe]

3. Remove the executable of the rogue into other random name (virus.exe or malware.exe) and restart your PC.
4. Upon reboot the malware should no longer be active. Thus, you can download the security application that will remove all remnants of System Care Antivirus scareware.

Note: To see the correct location of System Care Antivirus executable, right-click its desktop icon, click “Properties” and look for the information in “Target” field. It will tell the exact place where the rogue dwells on your PC.

Microsoft Standalone System Sweeper

These days many viruses and malwares  target  your PC , rendering the computer unbootable. Microsoft Standalone System Sweeper is a recovery tool that can help you start an infected PC and perform an offline scan to help identify and remove viruses, trojans, rootkits and other forms of malware effectively.

It can also be used if you cannot install or start an antivirus solution on your PC, or if the installed solution can’t detect or remove malware on your PC.This tool installs itself to either a USB drive or a blank CD/DVD disc and creates a bootable media that can be used to recover your system in the event of a malware or virus infection.

please ensure  that you have a blank CD, DVD, or USB drive with at least 250 MB of space, and an active Internet connection .To use Standalone System Sweeper ,users need to boot from the disc or USB device which in turn loads the tool that gives you the options to scan the PC and recover it.

It will load the Windows preinstall environment to run the Microsoft Standalone System Sweeper application for scanning .This  will first scans your boot sector for any corrupted files or settings. It then scans your system for any known malware or infections.

Download: http://go.microsoft.com/fwlink/?LinkId=215854

How to Remove Win 7 Anti-Spyware 2011 (Fake Anti-Virus Infections)

If your PC is infected with the Win 7 Anti-Spyware 2011 malware or something similar, you’ve come to the right place, because we’re going to show you how to get rid of it, and free your PC from the awful clutches of this insidious malware (and many others)

Win 7 Anti-Spyware 2011 is just one of many fake antivirus applications like Antivirus Live, Advanced Virus Remover, Internet Security 2010, Security Tool, and others that hold your computer hostage until you pay their ransom money. They tell you that your PC is infected with fake viruses, and prevent you from doing anything to remove them.

This particular virus goes by a lot of names, including XP Antispyware, Win 7 Antispyware, Win 7 Internet Security 2011, Win 7 Guard, Win 7 Security, Vista Internet Security 2011, and many, many others. It’s all the same virus, but renames itself depending on your system and which strain you get infected with.

The What Now?

If you aren’t familiar with this one, it’s time to take a look at the face of an awful scam. If you are infected, scroll down to the section where we explain how to remove it.

Once a PC is infected, it’ll display this very official-looking window, which pretends to scan your PC and find things that are infected, but of course, it’s all a lie.

The really crazy thing is that it pops up a very realistic looking Action Center window, but it’s actually the virus.

Removing Rogue Fake Antivirus Infections (General Guide)

There’s a couple of steps that you can generally follow to get rid of the majority of rogue antivirus infections, and actually most malware or spyware infections of any type. Here’s the quick steps:

  • Try to use the free, portable version of SUPERAntiSpyware to remove the viruses.
  • If that doesn’t work, reboot your PC into safe mode with networking (use F8 right before Windows starts to load)
  • Try to use the free, portable version of SUPERAntiSpyware to remove the viruses.
  • Reboot your PC and go back into safe mode with networking.
  • If that doesn’t work, and safe mode is blocked, try running ComboFix. Note that I’ve not yet had to resort to this, but some of our readers have.
  • Install MalwareBytes and run it, doing a full system scan. (see our previous article on how to use it).
  • Reboot your PC again, and run a full scan using your normal Antivirus application (we recommend Microsoft Security Essentials).
  • At this point your PC is usually clean.

Those are the rules that normally work. Note that there are some malware infections that not only block safe mode, but also prevent you from doing anything at all. We’ll cover those in another article soon, so make sure to subscribe to How-To Geek for updates (top of the page).

Removing Win 7 Anti-Spyware 2011

Download a free copy of MalwareBytes, copy it to a thumb drive, and then install it on the infected PC and run through a scan. You might have better luck doing this in Safe Mode.

You may have better luck installing MalwareBytes first, if the virus will let you. In my case, it did not. When I scanned through the first time using SUPERAntiSpyware, it detected the viruses and removed the files just fine.

At this point, you should hopefully have a clean system. Make sure to install Microsoft Security Essentials, and don’t be fooled by these viruses again.

Can’t Open Any Applications After Deleting the Virus?

The next problem was that once the virus was removed, you couldn’t open anything—in fact, I still wasn’t even able to install MalwareBytes. Hopefully you have better luck.

Why couldn’t I open anything? Because the virus had rewritten the registry to force all applications to open the virus instead—which meant you couldn’t even open the registry editor to fix the problem. This problem might have been avoided had I properly completed the scan, but I interrupted it before it was done.

On a normal PC, there’s a registry key under HKEY_CLASSES_ROOT that specifies what happens when you double-click on an executable file (*.exe) – but on a virus-infected system, this value is rewritten with the virus executable. That’s how it prevents you from opening anything.

To fix the problem, I exported a clean registry file from another PC, and did a little extra hacking to it, and problem solved! All you have to do is download, extract, copy the .reg file to the infected PC, and double-click it to add the information into the registry.

SpyDLLRemover - Advanced Spyware Detection and Removal Tool

Sometimes you have problem with high CPU utilization by System process .For example malicious trojan horse  like Graybird.1.,once it has gained entry, that  will start it's mischief by creating a start-up registry entry. Hereafter, the symptoms include the infected system producing unusual amounts of outbound traffic.febb.dll ,9dd1.dll and wqrgizey.dll  are some of the dll files related to this.SpyDLLRemover is the standalone tool to effectively detect and delete such spywares from the system. It comes with advanced spyware scanner which quickly discovers hidden Rootkit processes as well suspcious/injected DLLs within all running processes.

The DLL search feature helps in finding DLL within all running processes using partial or full name. Then user can choose to remove the DLL from single process or from all loaded processes with just one click.One of the unique feature of SpyDLLRemover is its capability to free the DLL from remote process using advanced DLL injection method which can defeat any existing Rootkit tricks. It also uses sophisticated low level anti-rootkit techniques to uncover hidden userland Rootkit processes as well as to terminate them.

Features

  • Advanced Spyware Scanner which efficiently discovers hidden Rootkit processes as well as suspicious/injected DLLs within all running processes in the system.

  • Detection and removal of hidden userland Rootkit processes using sophisticated techniques such as Direct NT System Call Implementation, Process ID Bruteforce Method (PIDB) as first used by BlackLight and CSRSS Process Handle Enumeration Method

  • State of art technique for completely freeing the injected DLL from remote process based on advanced DLL injection method using low level implementation which defeats any blocking attempts by Rootkits.

  • Sophisticated DLL auto analysis which helps in separating out the legitimate modules/DLLs from the malicious ones. Such DLLs are displayed using different colors representing various threat levels for quicker and easier identification.

  • Integrated online verification mechanism through ProcessLibrary.com to validate any suspicious DLLs. This makes it easy to differentiate between the spyware & legitimate DLLs.

  • ‘DLL Tracer’ feature to search for DLL within all running processes using partial or full name. Then user can choose to remove the DLL from single process or from all loaded processes with just one click.

  • Sort the process/DLL in the list based on various parameters for easier and quicker analysis.

  • Detailed report generation of Spyware scanning result as well as process/DLL list in standard HTML format for offline investigation.

  • View the process/DLL properties for more information by just double clicking on the process/DLL entry in the list.

  • Feature to show all running processes in the system which has loaded the selected DLL. Also user can click on “Remove DLL from ALL’ button to quickly remove any such malicious DLL from all loaded processes.

  • Termination of suspicious or hidden process based on low level implementation which makes it very effective against any Rootkit techniques.

  • Displays detailed information about all running processes on the system

  • Shows detailed information about each loaded DLLs within process to make it easier for manual analysis.

  • It is standalone tool which does not require any installation and can be executed directly.

  • Enriched user interface along with more user friendly options makes it the cool tool.

Download Spy DLL Remover |1.03MB|OS: Windows XP, 2003, Vista, Longhorn and Windows 7.

A New Gmail Virus (Rememberthistime.rar) – Fixed!!

Since two days I was struggling with this virus, and now I found the fix for this, and now I’m able to run Firefox. So i want to share this steps are below  mentioned.

1) Run %temp% and delete all files.

2) Install NOD 32 latest version, and run the scan for Operating Memory and the Windows Installation Drive, after that better install Malwarebytes and run.

3) It should delete the C:\Windows\Pifex32.inf file (may be the filename might vary and I’m not sure about it, do comment). And if it does not, find out manually and delete it.

4) Basically the virus is attached to a service called services.exe (ironic!) and Mozilla Firefox doesn’t work even if  you run it with the explorer.exe ended.

5) Fire up the Firefox, and it should run normally (No need to reinstall if you haven’t done it already).

That is sufficient to bend the bug. For now I’m not having any recurring problem from that virus. So I feel I’ve fixed the issue. Share this with your friends so that they don’t start reinstalling their Firefox.


To Protect Yourself


This Virus will auto sent from anyone in your contact list. If you find any of your friend’s mail with the following subject and body, and an attachment, simply hit delete.


Subject: hey

Body: I ran into some of your old friends the other day, they wanted me to send you this.

Attachment: rememberthistime.rar

NEVER EVER Open the attachment, as it is very unlikely for your antivirus to detect it, and as I happened to open it, I know what is inside the rar. It contains a rememberthistime.scr file, which has an icon of a monitor, and makes you feel it is a screensaver, and when you run it (which Idiotically I did) , nothing happens. But little Googling tells me that, mails will be sent from my mail to my contacts.

First Thing You need to do

1) Delete the mail that came in

2) Change your password to something totally different than the existing ones ( And better do this from some other machine )

Further reading

http://www.google.com/support/forum/p/gmail/thread?tid=6079efd2d0af6ab0&hl=en

Remove Malware With RegRun Reanimator

Malware like Trojans/Adware/Rootkits  are software   designed to infiltrate a computer system without the owner's informed consent , which  damage your pc and your security.RegRun Reanimator is a handy tool designed to help you remove such malicious programs from your computer.

After scanning  Reanimator will show you a list of the suspicious files it found ,you will be allowed to decide if they are actually a threat or not by clicking on them.Greatis Support team  will support you if you send a log report to them  for analysis.They will provide you a .rnr file which you can use to continue with the malware removal.

Reanimator makes a boot scan at the reboot of the system to detect easier hidden rootkits, has a registry guard tool to protect registry, makes system restore points, has a restore manager with registry rescue, safe deleting features, is able to unlock banned task manager and Regedit after a virus attack and makes/restores backups.The scanning process is fast, the software generates reports after virus scanning, the software is also able to protect the computer against USB flash viruses.

Download |Windows 95/98/Me/NT4/2000/XP/2003/VISTA/7 | Tutorial |8.2MB |Freeware

How To Install Multiple Antivirus Programs

We always wish our computers to be secure from damages especially from Viruses.We use Anti-virus software for our computer in order to protect it from getting viruses. But none of them can be 100% secure to save our computers from Viruses. However we also may think of installing multiple anti-viruses at a same time on our computer.But installing two or more antivirus is not possible , because antivirus software nowadays are so complex and they may conflict with each other causing crashes and blue screens.It also leads to system resources hog  and slows the computer down.

Recently found a tool called Multi AV Scan developed by Gakh from HackHound that allows you to run on-demand scan using 10 types antivirus on your computer.It is possible  to run two or more antivirus  programs with this third party software. Multi AV Scan is a standalone software and it  does not provide real time protection.It is not required to uninstall your current antivirus to run Multi AV Scan.It currently supports A-Squared, Avira AntiVir, BitDefender, ClamWin, DrWeb, Ikarus, McAfee, Solo, Sophos, VBA32.

This program is little buggy.It  will continue  Scanning the whole time without progress unless  you have to put the file that you want to scan in the same folder where  MultiScan.exe installed.If you’re using Avira AntiVir, you need to place Avira license key HBEDV.KEY (you can get it for free here) file in \AVs\AntiVir\ folder.It also  consume  more resources during updating and scanning.It works with XP and Vista

  Part1 Part2 Part3

Enable show hidden files and folders after Virus infected

Some virus or Trojans can hide themselves into a corner of the system, and sometimes it effectively force disable the “show all hidden files and folders” or “show all hidden files, folders and drives” option under the “folder options”. When it happens, hidden files, folders and drives on the PC do not been shown or displayed even though user has attempted to apply the settings to show the hidden files. The virus implements a policy such as “Shockwave.dll” that’s forcing system to keep hidden files forever not visible or hidden.

If your anti-virus or anti-malware solution is unable to get rid of the malware, and you’re very much needed to view the hidden files, here’s the workaround to enable system to show hidden files and folders again. There are many viruses that may cause the hidden files cannot be visible error, thus the following solution may not work on some system.

  • Go to Start Menu and click on Run (vista and Windows 7 uses Start Search instead).
  • Type regedit and press Enter to run
  • Navigate to the following registry key:

HKEY_LOCAL_MACHINE\SOFTWARE\Microsoft\Windows\
CurrentVersion\Explorer\Advanced\Folder\Hidden\SHOWALL

  • In the right pane, verify that the CheckedValue value data is REG_DWORD type. If it’s not (such as belongs to REG_SZ), then delete the CheckedValue value data.
  • If CheckedValue has been delete, create a new DWORD (32-bit) Value and name it as CheckedValue.
  • Double click on CheckedValue and change its value data to 1 (virus may change it to 0 or 2).
  • Within the same registry key, verify that the Type value data is of REG_SZ type, and has the value data radio. If not, set it to radio. Virus may change it to blank.
  • Set the system to reveal or show all hidden files, folder and drives, and then check if hidden files and folders are show.

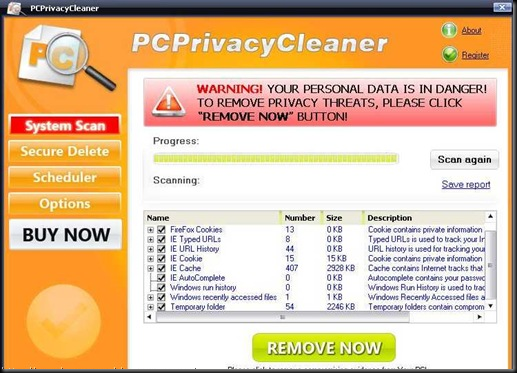
Removal of PC Privacy Cleaner

PC Privacy Cleaner is a fake registry cleaner tool, which pretends to be able to clean your registry.PCPrivacyCleaner may spread with trojans, or you can get duped into downloading PCPrivacyCleaner from PCPrivacyCleaner.com. Once you’ve got PCPrivacyCleaner, it pops up annoying messages and runs fake scans.

Symptoms

  • "Critical System Error",
  • "Your computer is infected",
  • Hijacked homepage to obscure webpage.
  • Flashing icons appear on your system tray (Near of your system clock).

    Manual Removal Steps

    1.Press Ctrl+Alt+Del to open Task Manager,check any process like pcpc.exe/PCPC_Setup_Free.exe running,kill that process

    2.Open C:\Program Files (assuming windows installed in C drive) and delete the folder named PCPrivacyCleaner or To find PCPrivacyCleaner directories, go to Start > My Computer > Local Disk (C:) > Program Files > Show the contents of this folder.Search and delete the following PCPrivacyCleaner directories:
    C:\ProgramFiles\pcprivacycleaner
    %common_programs%\pcprivacycleaner
    %program_files%\pcprivacycleaner

    3.Remove  PC Privacy Cleaner  short cuts from desktop, start menu and quick launch.Empty Recycle Bin

    4.If PCPrivacyCleaner changed your homepage?Start menu > Control Panel > Internet Options. Next, under Home Page, select the General > Use Default. Type in the URL you want as your home page (e.g., “http://www.google.com”). Then select Apply > OK. You’ll want to open a fresh web page and make sure that your new default home page pops up.

    5.How to remove PCPrivacyCleaner registry keys?

    Start->Run-> type regedit and press enter.Remove following entries

    HKEY_CURRENT_USER\software\pcprivacycleaner
    HKEY_CURRENT_USER\software\pcprivacycleaner activationcode
    HKEY_CURRENT_USER\software\pcprivacycleaner cookieparams
    HKEY_CURRENT_USER\software\pcprivacycleaner installdate
    HKEY_CURRENT_USER\software\pcprivacycleaner lastscantime
    HKEY_CURRENT_USER\software\pcprivacycleaner totalscancount
    HKEY_CURRENT_USER\software\pcprivacycleaner\schedule
    HKEY_LOCAL_MACHINE\software\microsoft\windows\currentversion\run pcprivacycleaner                                                                                                 HKEY_LOCAL_MACHINE\SOFTWARE\Classes\CLSID\{70d17a5f-ef27-4295-90f5-20ad6f24834f}
    HKEY_LOCAL_MACHINE\SOFTWARE\Classes\CLSID\{80ced3d6-ece9-48ba-8df8-2503d8d87c2b}
    HKEY_LOCAL_MACHINE\SOFTWARE\Classes\CLSID\{aa6d4f53-4c8d-4549-84d2-02d584acc4e9}

    6.How to remove PCPrivacyCleaner DLL files

    To locate the PCPrivacyCleaner DLL path, go to Start > Search > All Files or Folders. Type PCPrivacyCleaner and in the Look in: select either My Computer or Local Hard Drives. Click the Search button.

    Once you have the PCPrivacyCleaner DLL path,Start->Run->type cmd and click “OK.” To change your current directory, type “cd” in the command box, press your “Space” key, and enter the full directory where the PCPrivacyCleaner DLL file is located. (If you’re not sure if the PCPrivacyCleaner DLL file is located in a particular directory, enter “dir” in the command box to display a directory’s contents. To go one directory back, enter “cd ..” in the command box and press “Enter.”)

    Here you type regsvr32 /u [dll_name] and press enter to unregister the DLL.If you accidentally do something wrong, you can register it again by using regsvr32 [dll_name].eg:regsvr32 /u pcpc.dll  .(How to register/unregister a .dll file)

    PCPrivacyCleaner Automatic Removal Instructions

    Print these instructions because you’ll have to reboot into Safe Mode. Also back up your computer in case you make a mistake

    1. Download and save SmitFraudFix to your desktop.

    2. Restart your computer in Safe ModeOnce thedesktop appears, double click on the SmitfraudFix.exe on your desktop.

    3. After the credits screen, you’ll see a menu. Select the option number 2, which is ‘Clean (safe mode recommended)’, and thenpress Enter to delete infect files.

    4. SmitFraudFix will begin cleaning your computer and take a series of cleanup processes. When the process is over, it will automatically begin the Disk Cleanup program.

    5. Once the Disk Cleanup program is complete, you will be prompted with the message ‘Registry cleaning - Do you want to clean the registry’. Answer Y (Yes) and hit Enter. Reboot your computer.

    6. SmitFraudFix will now check if wininet.dll is infected. SmitFraudFix will ask you whether to replace the infected file (if there’s any) ‘Replace infected
      file?’
      Answer by typing Y (Yes) and hit Enter.

    7. Reboot your computer to complete the cleaning process.

    8. After reboot, a Notepad screen may appear containing a log of all the filesremoved from your computer. If it doesn’t appear, a file will be created called rapport.txt in the root of your drive, (Local Disk C:).

    9. Restart your computer in Safe Mode .

    10. Go to C:\Windows\Temp, click Edit, click Select All, press DELETE, and thenclick Yes to confirm that you want all the items to go to the Recycle Bin.

    11. Go to C:\Documents and Settings\[LISTED USER]\Local Settings\Temp, click Edit, click Select All, press DELETE, and then click Yes to confirm that
      you want all the items to go to the Recycle Bin.

    12. Reboot your computer back to normal mode.

    How to use  SmitfraudFix ,detailed instructions here

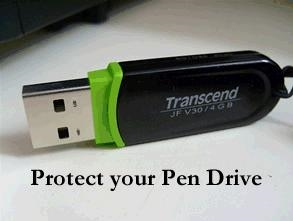
  • Protect your PEN/USB Drive from Virus

    imageWorld is shrinking, and so are the data storage devices. One common device which every one use is USB devices like thumb drive, PEN drive, USB Hard disks etc...
    After floppy disks which were earlier prone to many viruses, now it is time for USB Devices. Below are some safety precautions that you may perform before transferring data from USB devices.

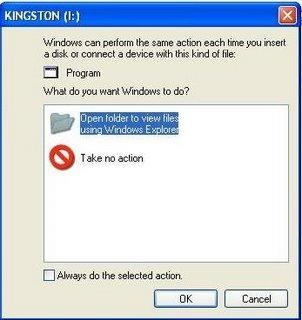
    1) When you plug in the USB device in your system (Desktop / Laptop), you will most likely be prompted by a popup window as shown below.

    image

    2) Dont select any of them, simply click cancel.

    3) Goto Start -> Run and type cmd to open the Comman Prompt window

    4) Now double click My Computer Icon (which is usually present in the desktop). It should show the list of drives available in this machine. Check the drive letter of the inserted USB Device. (As in above case it is (I:))

    5) Go back to the command prompt and type the drive letter and hit Enter.

    6) Now type the below command and hit Enter. This command displays all the hidden files and folders in the current working drive (I: Drive in our case)

        I:\> dir/w/o/a/p

    7) You will be able to see a list of files, after you run the above command. In the list, check if you see any one of the files mentioned below,

        - Autorun.inf

        - New Folder.exe

        - Bha.vbs

        - Iexplore.vbs

        - Info.exe

        - New_Folder.exe

        - Ravmon.exe

        - RVHost.exe

    or any other unknown .exe files that you are unaware of and you have not copied to the device earlier.

    8) If you find any one of the files listed above, you are right!!! you have got a virus in your USB device. Don't panic, it will be transferred to your system and start its duties only when you start copying the files to your computer's hard drive.

    9) Now that you have confirmed that you have virus in your USB device, now type the following command and hit enter

        I:\> attrib -h-r-s-a *.*

        attrib command is for displaying and changing the attributes of the files.

    10) Now Delete each of the files that you were not aware of and found to be on the above list by using the below command and hit enter

        I:\> del <filename>

        For eg. I:\> del Autorun.inf

    11) That's it, you did it!!!!!!!! now your USB Device is free of virus.

    Note: Some viruses are vulnerable to antivirus softwares. When unnoticed these viruses sits in system registry and doesnot allow the antivirus software to locate the source file. But it generates a virus child file in all the folders of the system. Antivirus software may detect the child file and delete it, but it keeps on generating. It cannot be stopped until source virus file is removed.

    Removal of Smart Antivirus 2008

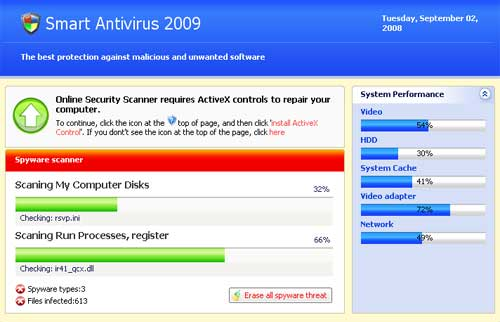
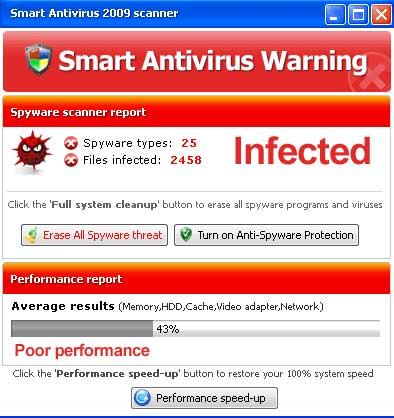
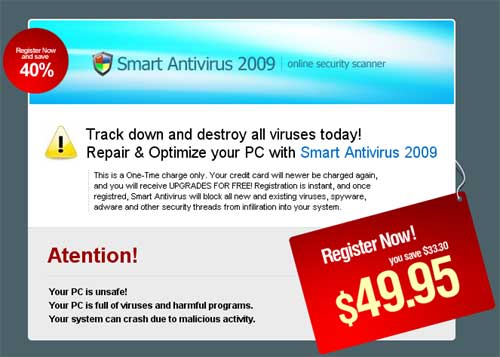
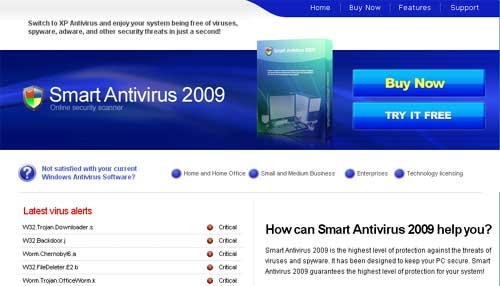
    Smart Antivirus 2009 Technical Details

    • Full name: Smart Antivirus 2009, SmartAntivirus 2009, SmartAntivirus2009
    • Type: Rogue anti-spyware
    • Version: 2009
    • Origin: Russian Federation, http://smartantivirus2009.com

     image

    image

    image

    image

    Automatic Removal of Smart Antivirus 2009 from your PC

    Smart Antivirus 2009 is undoubtedly based on some other tricky stuff. Therefore, there all reasons to suspect this malware in facilitation invasion of related rogues. Subsequently, it is preferable that you apply complex tool to remove Smart Antivirus 2009. Follow the link below to launch free scan for malware and get rid of Smart Antivirus 2009.

    Download

    Download Smart Antivirus 2009 Removal Tool

    Manual Removal of Smart Antivirus 2009

    Smart Antivirus 2009 manual removal should be successful, provided that all the instructions were applied correctly and in full. However, subject to your skills in managing such tasks, such removal may take too long time as for your opinion. In addition, scan for other malware is recommended to ensure overall safety of your PC.

    Remove Smart Antivirus 2009 files and dll’s:
    SmartAntivirus2009.exe

    Unregister Smart Antivirus 2009 registry values:

    HKEY_CURRENT_USER\Software\SmartAntivirus2009
    HKEY_CURRENT_USER\Software\SmartAntivirus2009
    HKEY_CLASSES_ROOT\.key
    HKEY_CURRENT_USER\Software\Microsoft\Windows\CurrentVersion\Run “SmartAntivirus2009″
    HKEY_LOCAL_MACHINE\SOFTWARE\Microsoft\Windows\CurrentVersion\Run “SmartAntivirus2009″

    Malwarebytes' Anti-Malware

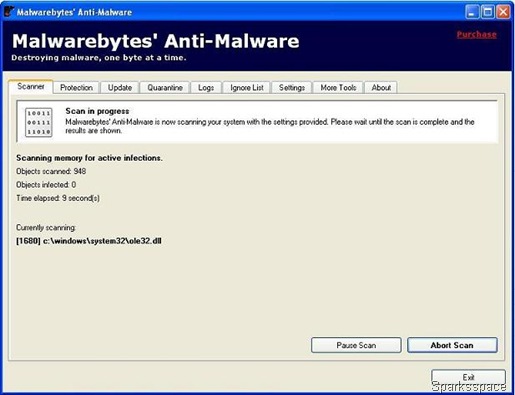
    Have you ever considered what makes an anti-malware application effective?Whether you know it or not your computer is always at risk of becoming infected with viruses, worms, trojans, rootkits, dialers, spyware, and malware that are constantly evolving and becoming harder to detect and remove. Only the most sophisticated anti-malware techniques can detect and remove these malicious programs from your computer

    Malwarebytes' Anti-Malware is a utility that monitors your system and thoroughly removes even the most advanced malware. It can detect and remove malware that even the most well-known Anti-Virus and Anti-Malware applications on the market today cannot. Malwarebytes' Anti-Malware monitors every process and stops malicious processes before they even start. The Realtime Protection Module uses our advanced heuristic scanning technology which monitors your system to keep it safe and secure.

    anti-malware1

    Key Features
    • Support for Windows 2000, XP, and Vista.
    • Light speed quick scanning.
    • Ability to perform full scans for all drives.
    • Malwarebytes' Anti-Malware Protection Module. (requires registration)
    • Database updates released daily.
    • Quarantine to hold threats and restore them at your convenience.
    • Ignore list for both the scanner and Protection Module.
    • Settings to enhance your Malwarebytes' Anti-Malware performance.
    • A small list of extra utilities to help remove malware manually.
    • Multi-lingual support.
    • Works together with other anti-malware utilities.
    • Command line support for quick scanning.
    • Context menu integration to scan files on demand.
      SysReq: Microsoft ® Windows 2000, XP, Vista| Trail Ver |1.99MB

      Removal of Antivirus XP 2008

      clip_image001

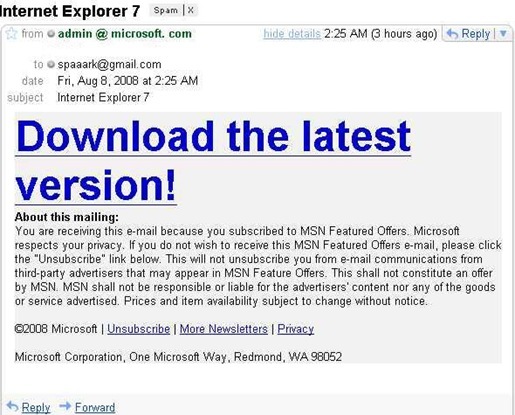
      This mail pretends to come from Microsoft, but it's not. There are many different links being used for the download. Microsoft don't send out EMails asking you to download files from random, non-Microsoft websites.

      clip_image002

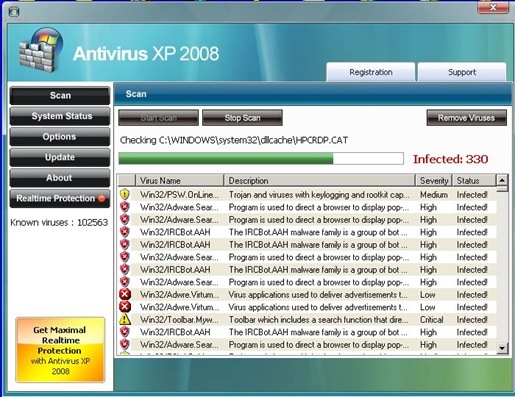
      If you click the link and install the file, then it downloads/installs the rogue security software Antivirus XP 2008 and its related files.A fake antivirus program appear on your  desktop.

      clip_image003

      By the time you see this, its probably too late.  This threat also  known to send the user fake infected alerts to provoke the victim into buying the product.  It also utilizes the Sysinterals fake Blue Screen of Death Screen Saver to scare the victim.

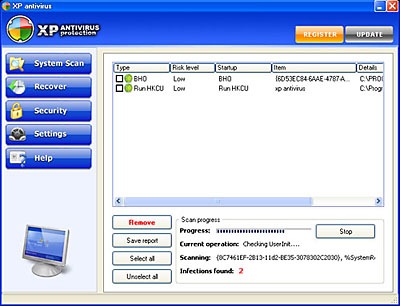
      AntivirusXP 2008, also known as also known as XP Antivirus 2008, Antivirus 2008 XP or AntiVirXP08, is a rogue anti-spyware program that performs fake system scans and displays warning messages to lure you to purchase AntivirusXP 2008's full version. AntivirusXP 2008 is usually downloaded and installed via a trojan called Zlob found on a media codecs that are downloaded from adult websites. AntivirusXP 2008 prompts users with warning messages and popups that state that you are infected with spyware in an attempt to get you to buy AntivirusXP 2008's commercial version. Another attempt used by AntivirusXP 2008 is to perform system scans that show false positives. AntivirusXP 2008 is not a legitimate spyware removal tool. AntivirusXP 2008 is clone of Xp Antivirus, XPAntivirus2008 and Antivirus 2008

      Symptoms of Antivirus XP 2008

      Pop up balloon warning messages claiming that your PC is infected.

      • "Critical System Error",
      • "Your computer is infected",
      • Hijacked homepage to obscure webpage.
      • Flashing icons appear on your system tray (Near of your system clock).

      Manual XP Antivirus 2008 Removal Instructions:

      clip_image004

      1.Unregister XP Antivirus 2008 DLL Files:

      shlwapi.dll
      wininet.dll

      How to Unregister DLL in Windows XP or Vista

      Here's how to do it:

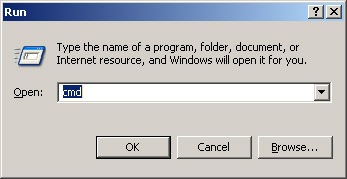
      1. From Start –> Run, type "cmd" then click on Open.
      2. clip_image005
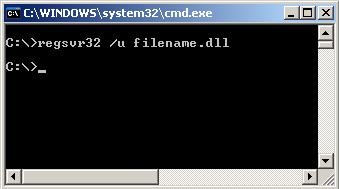
      3. Type "regsvr32 /u filename.dll" where "filename" is the name of the file that you like to unregister.
        clip_image006

      Please keep in mind that this involves system modification and can be highly risky. It's always recommended to keep a system backup handy, in case things go wrong
      2.Stop XP Antivirus 2008 Processes:
      XPAntivirus.exe
      XPAntivirusUpdate.exe
      xpa.exe
      xpa2008.exe

      How to Stop a Process in Windows XP or Vista

      . Here's how you do it:

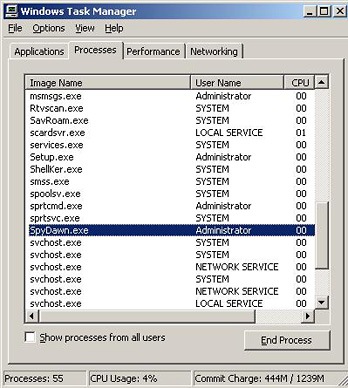
      1. Press "Alt+Ctrl+Delete", then click on "Task Manager". You can also launch the Task Manager instantly if you press Ctrl + Shift + ESC simultaneously. This is much easier than accessing it from Ctrl + Alt + Delete or the taskbar. It works for both Windows XP or Windows Vista.
      2. Select the process that you want to stop, then click on "End Process".
      3. clip_image007

      It's advised not to stop a system process. Stopping a system process can cause the computer to hang or freeze up.

      3.Find and Delete these XP Antivirus 2008:

      xpa.exe
      xpa2008.exe
      XPAntivirus.exe
      XPAntivirusUpdate.exe
      shlwapi.dll
      wininet.dll
      XP antivirus
      XPAntivirus.lnk
      Uninstall XPAntivirus.lnk
      XPAntivirus on the Web.lnk
      XPAntivirus.url
      XP Antivirus 2008.lnk
      Uninstall XP Antivirus 2008.lnk

      How to find and delete a file in Windows XP or Vista?

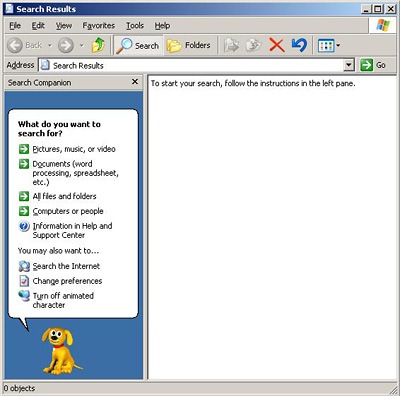
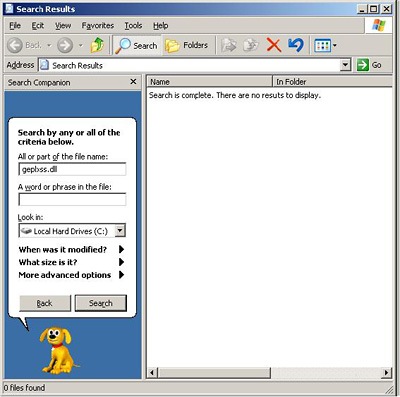
      1. From Start –> Search, then click on "For Files and Folders…"
      2. From "What do you want to search for?" list on the left, click on "All files and folders"
        clip_image008
      3. Type the filenames on the search box, and choose the "Local Hard Drives" (normally, it's C: drive)
        clip_image009
      4. Click on "Search". That's it!

      4.Remove XP Antivirus 2008 Registry Values:
      remove this entry from registry

      HKEY_USERS\Software\XP antivirus

      Here is how to do it

      1. In Windows XP, from Start, and then click on Run.
      2. Type "regedit", then click on OK.
        clip_image010
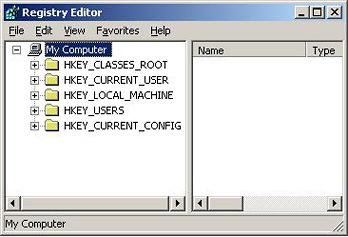
      3. Now it opens the Registry Editor.
        clip_image011
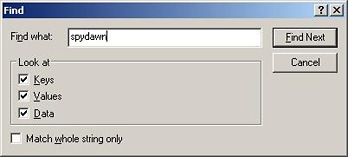
      4. You can easily navigate through the subkey if you know what you are looking for. Or, you can press "Ctrl + F" to locate the subkey that contains the value you want to edit. (F3 to Find Next)
        clip_image012

      5. Navigate to
      HKEY_LOCAL_MACHINE\SOFTWARE\Microsoft\Windows\CurrentVersion
      Locate and delete virus1 using right click
      Error! Filename not specified.
      6. Next Navigate to
      HKEY_LOCAL_MACHINE\SOFTWARE\Microsoft\Windows\CurrentVersion\Run
      Locate & delete SMvirus1 using right click
      Error! Filename not specified.
      7. Now go to
      HKEY_LOCAL_MACHINE\SOFTWARE\Microsoft\Windows\CurrentVersion\Uninstall\rhc1cdj0e12r
      del key Virus1 using right click
      Error! Filename not specified.
      8. Now
      HKEY_LOCAL_MACHINE\SOFTWARE\Microsoft\Windows\CurrentVersion\Internet Settings\User Agent\Post Platform
      Locate 'AntivirXP08' on right side and delete it.
      Now there is only one step left which can be performed only when you log in to windows next time.
      9.Navigate to
      HKEY_LOCAL_MACHINE\SOFTWARE\rhc1cdj0e12r
      del key Virus1
      10. Navigate to
      HKEY_CURRENT_USER\Software\Microsoft\Windows\CurrentVersion\Explorer\MenuOrder\Start Menu2\Programs\Antivirus XP 2008
      And delete the key Antivirus XP 2008

      Tools Needed for this fix:(software’s)

       
      Copyright 2008 IToxy