1. Close Outlook
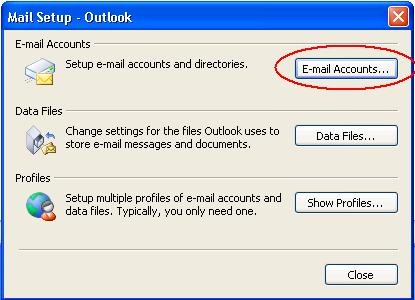
2. Go to Control panel > mail > email accounts… (Figure 1)
Figure 1
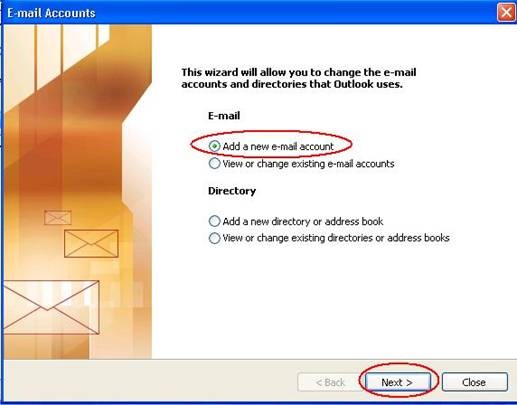
3. Click Add a new email account (if you have an existing account, click View or change existing e-mail accounts) and Click Next (Figure 2)
Figure 2
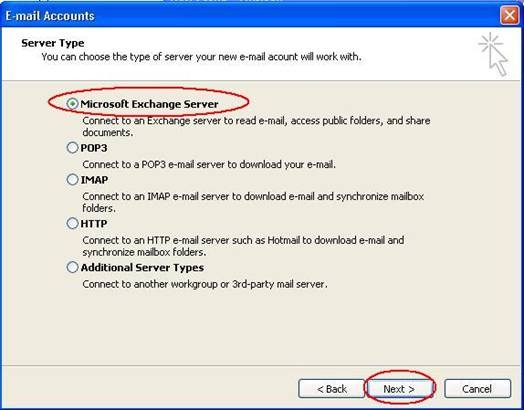
4. Select Microsoft Exchange Server and click Next (Figure 3)
Figure 3
5. In the Microsoft Exchange Server box, enter Fully qualified domain (pcsiggsrv.pcsigg.com)
6. Check Use Cached Exchange Mode
7. Enter your username (first part of your email address)
8. Click More Settings (Figure 4)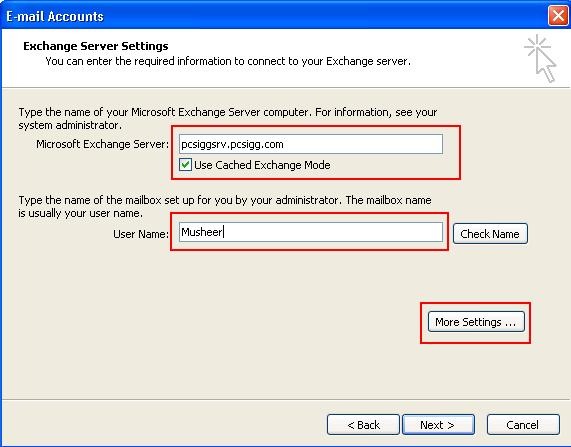
Figure 4
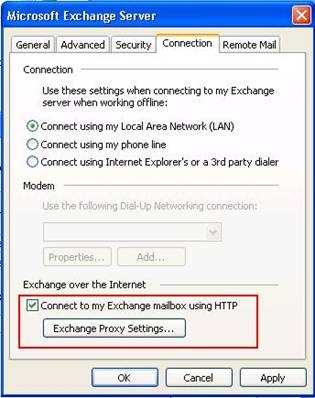
9. Click the Connection tab
10. By default, Connect using my Local Area Network should be selected
11. Check the box to “Connect to my exchange mailbox using HTTP”
12. Click the Exchange Proxy Settings button (Figure 5)
Figure 5
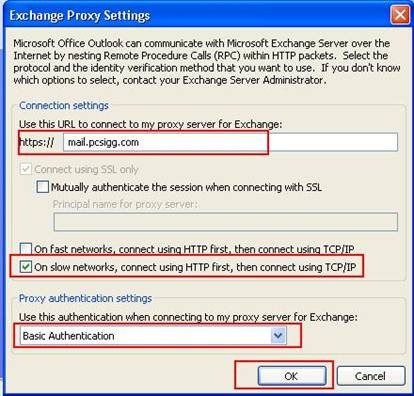
13. Enter mail.yourdomain.com (mail.pcsigg.com) as the URL
14. Check “On slow network, connect using HTTP first, then connect using TCP/IP”
15. Set the Proxy authentication settings to Basic Authentication. (Figure 6)
16. Click OK
Figure 6
17. Click OK and Next
18. When prompted to enter your login and password, enter USER@pcsigg.com (i.e. musheer@pcsigg.com) and your account password. You will be prompted to enter your credentials each time you open outlook. Your password can not be saved using this configuration.
19. Click Finish
20. Before you Launching outlook, go back to Control Panel > email > Email Accounts…(Figure 1)
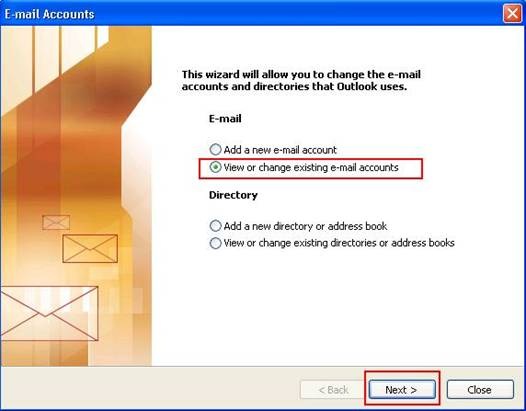
21. Click View or change existing e-mail accounts and Click Next (Figure 7)
Figure 7
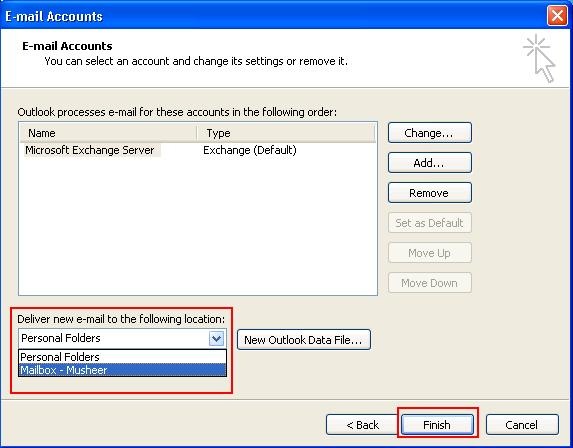
22. Click dropdown selection of Deliver new e-mail to the following location and change to Mailbox – Username (i.e. Mailbox – Musheer) and click Finish.(Figure 8)
Figure 8

