-
Without a Floppy

What ingredients are involved in this operation? The original Windows XP Installation CD, a freeware application named NLite and a blank CD. Moreover, we need the drivers for the SATA controller provided by the manufacturer. In case you did not find any floppy inside the motherboard package or you cannot locate them on the motherboard installation CD, you can consult the manufacturer's website to download the latest versions. To do the trick I have been talking about, it is assumed that you already have a Windows installed on an IDE drive. In case you don't, pay a visit to a friend and ask him to let you use his computer. It won't take too much time, I guarantee.
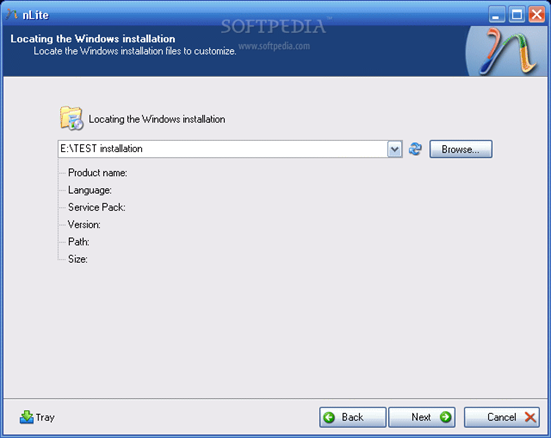
So, download the drivers and unzip them (in case they come archived) in a desired location. Then download and install the Nlite application. When you start the Nlite application, you will be asked to provide the location for the Windows installation package. Insert the genuine Windows Installation CD into the CD drive and, inside the application, select the CD drive letter.
To insert the SATA drivers within the installation package, you need to have it saved on the HDD. Hence, when the warning window appears click OK and select the destination folder for the files to be saved. Make sure that the destination partition / HDD has enough space to store the contents of the installation CD.
Immediately after you have chosen the destination folder, the application will start copying the Windows installation files. When finished, it will display some version information regarding the newly copied Windows Installation Package.

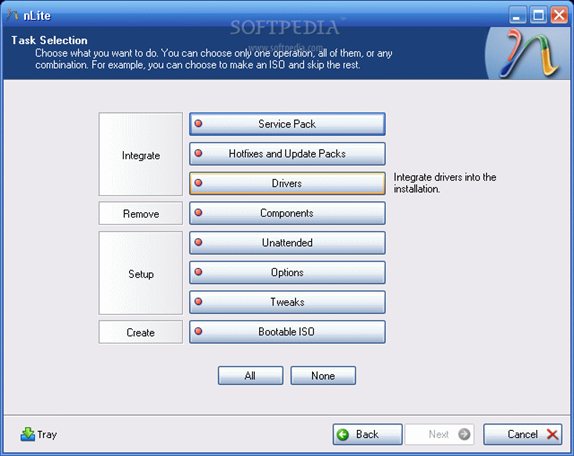
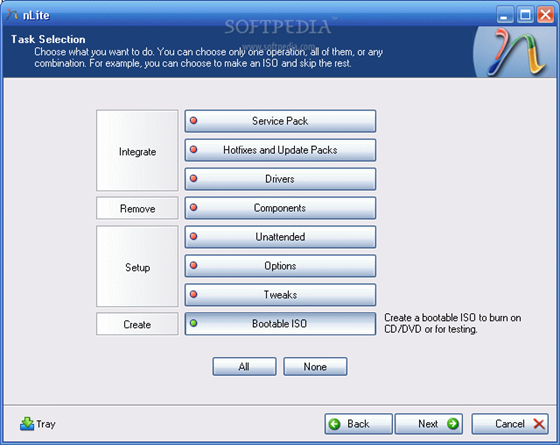
Now, click next twice until you get to a screen where you get options sorted in 4 categories: Integrate, Remove, Setup, Create. We are interested in the integration procedure, therefore select the Drivers button and click next. From the next menu window, click Insert and select multiple drive folder option from the drop down menu. This option permits you to browse to the location where the downloaded drivers are found.

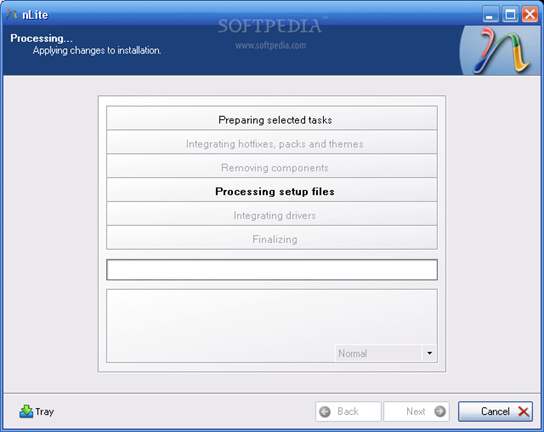
Select the containing directory and click next. You will get a list with the available drivers (in case there are more than one) or simply one driver. Select it (them) and click next. Now the application will ask for the permission to start the integration procedure. Choose Yes and wait for the drivers to be inserted into the installation package.


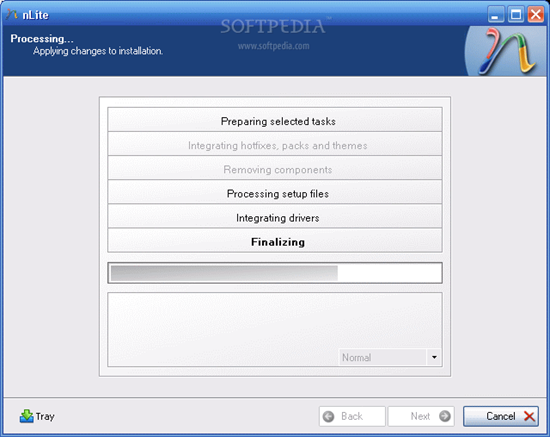
With problematic driver being included in the installation package you can install Windows XP on your SATA HDD...but...the installation package is on the HDD. You need a bootable CD in order to start an installation. Don't worry, once the installation package has been adorned with additional user selected drivers it can be transformed into a bootable disk image and later burned on a CD. To encapsulate the installation into a ISO image use the same Nlite application.
Open it, make sure the HDD installation folder is selected and click next. Select "Last session" preset and click next again. Now from the options menu choose Bootable ISO and click next. In the following window, make sure that the mode is set to "Create Image" and click Make ISO. A destination folder is required where the resulting ISO image will be saved. Once the image saving process finished you have the freedom to burn it on a blank CD with whatever you favorite CD burner software may be.

The new CD will be the twin copy of the Windows Installation CD but with one difference, it includes the SATA driver.
-
With a Floppy
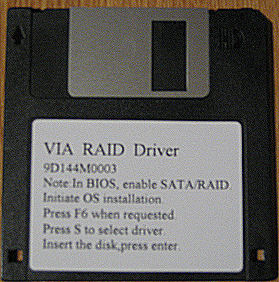
You need the RAID driver for the SATA/RAID controller on your PC's motherboard. It should look like the one shown below, or you can download the driver from motherboard manufacturer's website and copy to root of floppy disk.
Insert your Windows XP setup disk and reboot your PC. Let the PC boot from the CD and run the Windows setup. (You may need to adjust your BIOS to make the PC boot from the CD-ROM)
You see the blue screen of the setup program press F6 when you see it displayed in the white bar along the bottom. You will then be prompted to insert your driver diskette and press ENTER. The diskette will then be read and the will continue along the setup process.
You will then see the following screen.
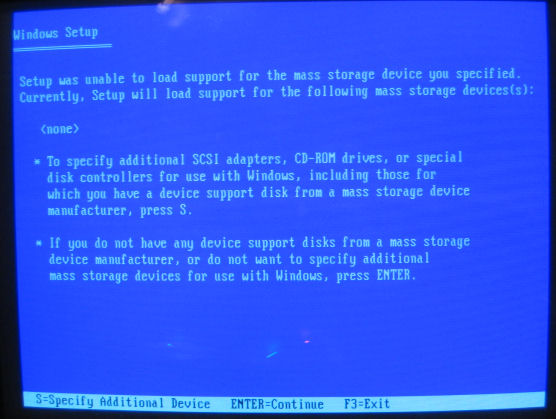
Select S to Specify Additional Device. It will present a list of drivers which it read from the disk earlier. Select the appropriate driver for your operating system. The setup will continue and this time it will recognize the SATA hard disk drive in your PC.