Welcome to IToxy.com

Hi, Welcome to IT Oxy. This blog is primarily aim to share our information on Information Technology. I really appreciate if you are willing to give any input to this blog. If you want to share something, email at: admin@IToxy.com If you found any post interesting and useful, then please leave a comment and share with your friends.

Welcome to IToxy.com

Hi, Welcome to IT Oxy. This blog is primarily aim to share our information on Information Technology. I really appreciate if you are willing to give any input to this blog. If you want to share something, email at: admin@IToxy.com If you found any post interesting and useful, then please leave a comment and share with your friends.

Welcome to IToxy.com

Hi, Welcome to IT Oxy. This blog is primarily aim to share our information on Information Technology. I really appreciate if you are willing to give any input to this blog. If you want to share something, email at: admin@IToxy.com If you found any post interesting and useful, then please leave a comment and share with your friends.

Welcome to IToxy.com

Hi, Welcome to IT Oxy. This blog is primarily aim to share our information on Information Technology. I really appreciate if you are willing to give any input to this blog. If you want to share something, email at: admin@IToxy.com If you found any post interesting and useful, then please leave a comment and share with your friends.

Welcome to IToxy.com

Hi, Welcome to IT Oxy. This blog is primarily aim to share our information on Information Technology. I really appreciate if you are willing to give any input to this blog. If you want to share something, email at: admin@IToxy.com If you found any post interesting and useful, then please leave a comment and share with your friends.

How to Disable Use of USB Storage Devices in Windows?

image

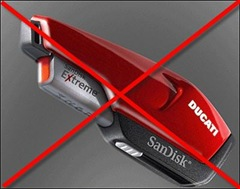
What happens if the users bring their own USB memory sticks and connect them to the computers at their office?With the size of USB storage devices increasing so much in recent years, the risk is increasing as more and more data could possibly be stolen or lost accidentally.

You can restrict access for installing new USB storage devices by changing the permissions of these files:

Type %windir%\inf in Explorer address bar or RUN dialog box and press Enter. It’ll open “inf” folder.

  • %SystemRoot%\Inf\Usbstor.pnf
  • %SystemRoot%\Inf\Usbstor.inf

To assign a user or group Deny permissions to the Usbstor.pnf and Usbstor.inf files, follow these steps:

  • Start Windows Explorer, and then locate the %SystemRoot%\Inf folder.
  • Right-click the Usbstor.pnf file, and then click Properties.
  • Click the Security tab.
  • In the Group or user names list, click the user or group that you want to set Deny permissions for.
  • In the Permissions for UserName or GroupName list, click to select the Deny check box next to Full Control, and then click OK.
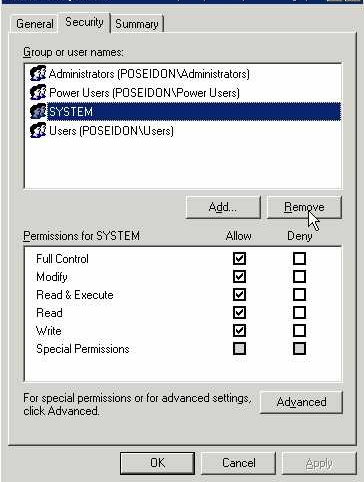
    Note In addition, add the System account to the Deny list.
  • Right-click the Usbstor.inf file, and then click Properties.
  • Click the Security tab.
  • In the Group or user names list, click the user or group that you want to set Deny permissions for.
  • In the Permissions for UserName or GroupName list, click to select the Deny check box next to Full Control, and then click OK.

image

You can disable USB storage access for a certain group of users this disabling and re-enablement of USB ports is based on a simple registry entry

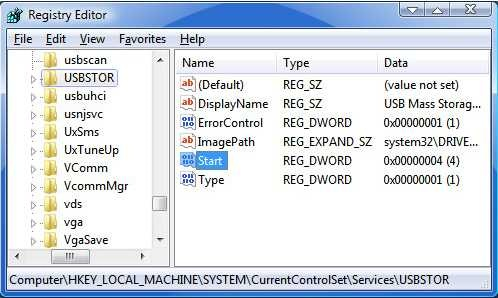
If a USB storage device is already installed on the computer, set the Start value in the following registry key to 4:

HKEY_LOCAL_MACHINE\SYSTEM\CurrentControlSet\Services\UsbStor

When you do so, the USB storage device does not work when the user connects the device to the computer. To set the Start value, follow these steps:

  • Click Start, and then click Run.
  • In the Open box, type regedit, and then click OK.
  • Locate, and then click the following registry key: HKEY_LOCAL_MACHINE\SYSTEM\CurrentControlSet\Services\UsbStor
  • In the right pane, double-click Start.
  • In the Value data box, type 4, click Hexadecimal (if it is not already selected), and then click OK.
  • Quit Registry Editor

image

To setup read only USB storage device operation, follow these steps below:

1. Click on the Start Button and type in Regedit and hit Enter.
2. Navigate through HKEY_LOCAL_MACHINE\SYSTEM\CurrentControlSet\Control.
3. Right click on Control and select New and then Key. Call the new key StorageDevicePolicies.
4. Right click on StorageDevicePolicies and select New and then Dword. Call the new dword WriteProtect.
5. Right click on WriteProtect and select Properties. Set the value to 1 and hit OK.
The computer is now configured to disable writing to USB storage devices.

Free tool - http://www.intelliadmin.com/blog/2007/01/disable-usb-flash-drives.html (two versions: local and remote)

To re-enable USB storage devices, you will need to restore the original permissions. From Windows 2000, or Windows XP  in Safe Mode:

  1. Click Start and then Run... and type %systemroot%\inf
  2. Look for usbstor.inf, right-click on it and click Properties.
  3. Click the Security tab, remove "SYSTEM" from the list.
  4. Click "Advanced..." and turn on "Allow inheritable permissions..." Click OK to save the change and OK again to close the Properties window.
  5. Repeat for usbstor.pnf.

Software wroth to try : Windows Network USB Drive Blocker 2.0.1.5

Gmail Adds Video and Voice Chat

Google announced that it is integrating a voice and video plug-in for it Gmail Chat offering that lets you see or hear the friend with which you are chatting.

image The feature looks cool, and it’s exceedingly straightforward. When you’re in Gmail, your contact list will show a little green camera icon next to any buddy who has a Webcam, is online, and has installed the Gmail Voice and Video Chat plug-in (which works with IE 7, some versions of IE 6, Firefox, Safari, and, of course, Chrome). Click the icon, and you get a chat window with video in the bottom right-hand corner of the Gmail interface. (You can also blow it up to full-screen mode.)
In order to access Gmail Video and Voice Chat, users have to install the voice and video plug-in.Installation is easy and only takes a few seconds to download the plug-in. Once the browser is restarted, a "Video and more" menu will appear at the bottom of the Gmail page. Go to the menu and select "start video chat." It will take a few moments for the video call to connect with your friend.


vista012

Removal of PC Privacy Cleaner

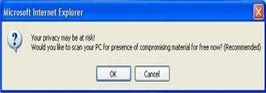
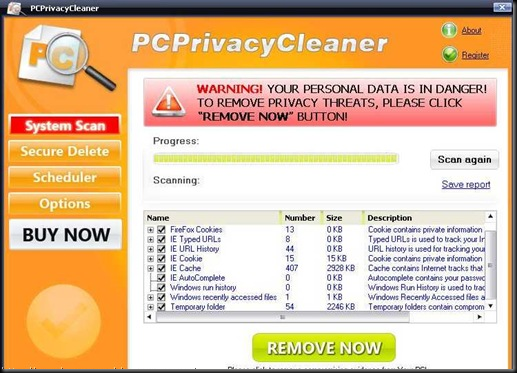
PC Privacy Cleaner is a fake registry cleaner tool, which pretends to be able to clean your registry.PCPrivacyCleaner may spread with trojans, or you can get duped into downloading PCPrivacyCleaner from PCPrivacyCleaner.com. Once you’ve got PCPrivacyCleaner, it pops up annoying messages and runs fake scans.

Symptoms

  • "Critical System Error",
  • "Your computer is infected",
  • Hijacked homepage to obscure webpage.
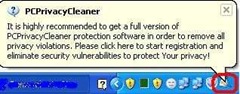
  • Flashing icons appear on your system tray (Near of your system clock).

    Manual Removal Steps

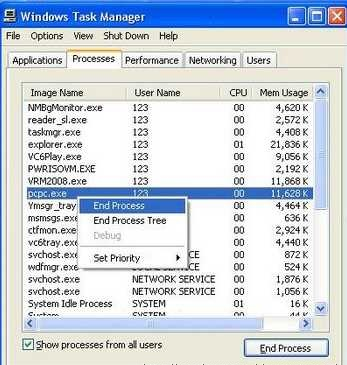
    1.Press Ctrl+Alt+Del to open Task Manager,check any process like pcpc.exe/PCPC_Setup_Free.exe running,kill that process

    2.Open C:\Program Files (assuming windows installed in C drive) and delete the folder named PCPrivacyCleaner or To find PCPrivacyCleaner directories, go to Start > My Computer > Local Disk (C:) > Program Files > Show the contents of this folder.Search and delete the following PCPrivacyCleaner directories:
    C:\ProgramFiles\pcprivacycleaner
    %common_programs%\pcprivacycleaner
    %program_files%\pcprivacycleaner

    3.Remove  PC Privacy Cleaner  short cuts from desktop, start menu and quick launch.Empty Recycle Bin

    4.If PCPrivacyCleaner changed your homepage?Start menu > Control Panel > Internet Options. Next, under Home Page, select the General > Use Default. Type in the URL you want as your home page (e.g., “http://www.google.com”). Then select Apply > OK. You’ll want to open a fresh web page and make sure that your new default home page pops up.

    5.How to remove PCPrivacyCleaner registry keys?

    Start->Run-> type regedit and press enter.Remove following entries

    HKEY_CURRENT_USER\software\pcprivacycleaner
    HKEY_CURRENT_USER\software\pcprivacycleaner activationcode
    HKEY_CURRENT_USER\software\pcprivacycleaner cookieparams
    HKEY_CURRENT_USER\software\pcprivacycleaner installdate
    HKEY_CURRENT_USER\software\pcprivacycleaner lastscantime
    HKEY_CURRENT_USER\software\pcprivacycleaner totalscancount
    HKEY_CURRENT_USER\software\pcprivacycleaner\schedule
    HKEY_LOCAL_MACHINE\software\microsoft\windows\currentversion\run pcprivacycleaner                                                                                                 HKEY_LOCAL_MACHINE\SOFTWARE\Classes\CLSID\{70d17a5f-ef27-4295-90f5-20ad6f24834f}
    HKEY_LOCAL_MACHINE\SOFTWARE\Classes\CLSID\{80ced3d6-ece9-48ba-8df8-2503d8d87c2b}
    HKEY_LOCAL_MACHINE\SOFTWARE\Classes\CLSID\{aa6d4f53-4c8d-4549-84d2-02d584acc4e9}

    6.How to remove PCPrivacyCleaner DLL files

    To locate the PCPrivacyCleaner DLL path, go to Start > Search > All Files or Folders. Type PCPrivacyCleaner and in the Look in: select either My Computer or Local Hard Drives. Click the Search button.

    Once you have the PCPrivacyCleaner DLL path,Start->Run->type cmd and click “OK.” To change your current directory, type “cd” in the command box, press your “Space” key, and enter the full directory where the PCPrivacyCleaner DLL file is located. (If you’re not sure if the PCPrivacyCleaner DLL file is located in a particular directory, enter “dir” in the command box to display a directory’s contents. To go one directory back, enter “cd ..” in the command box and press “Enter.”)

    Here you type regsvr32 /u [dll_name] and press enter to unregister the DLL.If you accidentally do something wrong, you can register it again by using regsvr32 [dll_name].eg:regsvr32 /u pcpc.dll  .(How to register/unregister a .dll file)

    PCPrivacyCleaner Automatic Removal Instructions

    Print these instructions because you’ll have to reboot into Safe Mode. Also back up your computer in case you make a mistake

    1. Download and save SmitFraudFix to your desktop.

    2. Restart your computer in Safe ModeOnce thedesktop appears, double click on the SmitfraudFix.exe on your desktop.

    3. After the credits screen, you’ll see a menu. Select the option number 2, which is ‘Clean (safe mode recommended)’, and thenpress Enter to delete infect files.

    4. SmitFraudFix will begin cleaning your computer and take a series of cleanup processes. When the process is over, it will automatically begin the Disk Cleanup program.

    5. Once the Disk Cleanup program is complete, you will be prompted with the message ‘Registry cleaning - Do you want to clean the registry’. Answer Y (Yes) and hit Enter. Reboot your computer.

    6. SmitFraudFix will now check if wininet.dll is infected. SmitFraudFix will ask you whether to replace the infected file (if there’s any) ‘Replace infected
      file?’
      Answer by typing Y (Yes) and hit Enter.

    7. Reboot your computer to complete the cleaning process.

    8. After reboot, a Notepad screen may appear containing a log of all the filesremoved from your computer. If it doesn’t appear, a file will be created called rapport.txt in the root of your drive, (Local Disk C:).

    9. Restart your computer in Safe Mode .

    10. Go to C:\Windows\Temp, click Edit, click Select All, press DELETE, and thenclick Yes to confirm that you want all the items to go to the Recycle Bin.

    11. Go to C:\Documents and Settings\[LISTED USER]\Local Settings\Temp, click Edit, click Select All, press DELETE, and then click Yes to confirm that
      you want all the items to go to the Recycle Bin.

    12. Reboot your computer back to normal mode.

    How to use  SmitfraudFix ,detailed instructions here

  •  
    Copyright 2008 IToxy